Entertainment
Enhancing Workplace Safety in Carpentry with Leather Carpenters Aprons
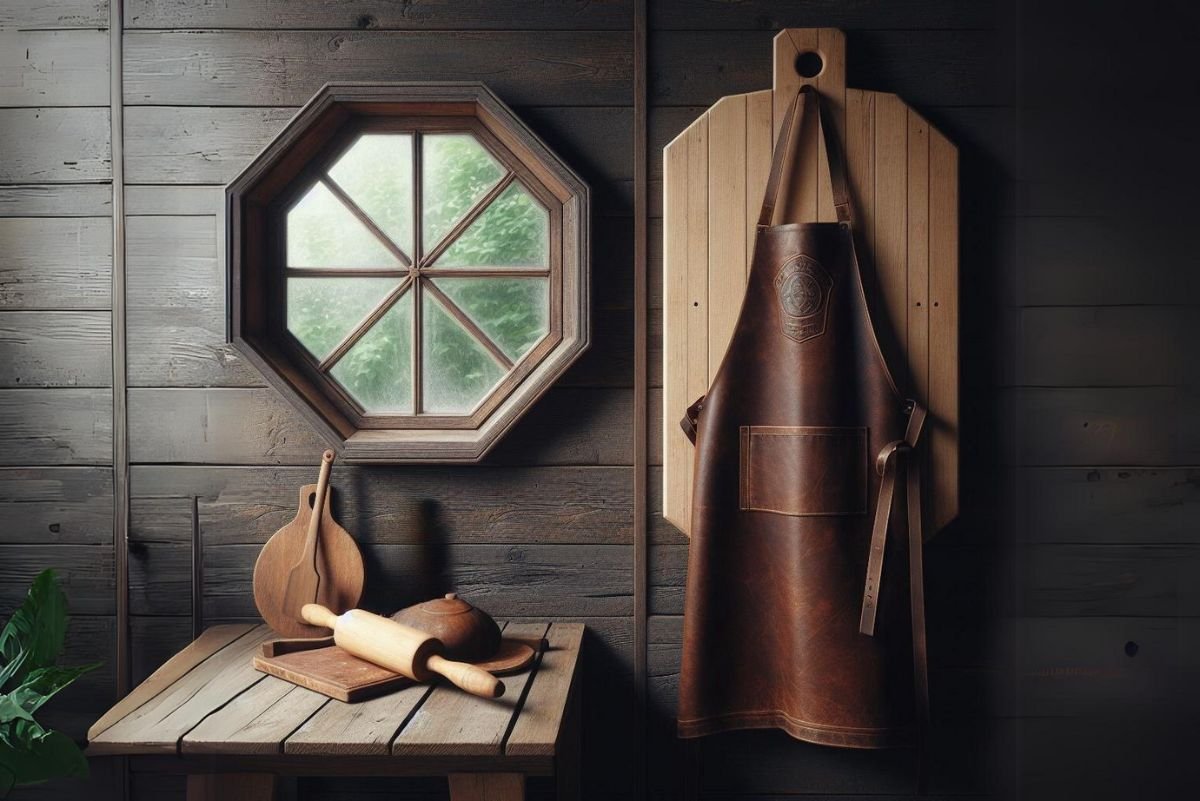
Carpentry is a craft that requires precision, skill, and dedication. However, it also comes with its fair share of risks. From sharp tools to flying debris, carpenters face numerous hazards in the workshop every day. To mitigate these risks and ensure a safe working environment, the use of appropriate protective gear is essential. Among the most indispensable pieces of safety equipment is the leather carpenters apron. In this article, we will explore how leather carpenter’s aprons enhance workplace safety in carpentry, providing protection, comfort, and peace of mind to craftsmen around the world.

Protection Against Cuts and Abrasions
In the carpentry workshop, sharp tools and rough materials pose a constant threat of cuts and abrasions to carpenters. The thick, durable leather of the apron acts as a protective barrier against these hazards, reducing the risk of injury to the wearer. Whether handling saws, chisels, or nails, carpenters can work confidently knowing that their skin is shielded from sharp edges and abrasive surfaces. Additionally, the apron’s full coverage design ensures that vulnerable areas of the body, such as the torso and thighs, are protected from harm, further minimizing the risk of injury. Leather carpenter’s aprons provide not only physical protection but also psychological reassurance to carpenters. Knowing that they are wearing a sturdy layer of defense against potential injuries allows craftsmen to focus more on their work, enhancing their productivity and efficiency in the workshop. This peace of mind is invaluable, particularly in high-pressure situations where concentration and attention to detail are crucial.
Shielding Against Flying Debris
Woodworking tasks such as cutting, sanding, and drilling can produce a significant amount of dust, chips, and splinters, which can pose a hazard to exposed skin and clothing. Leather carpenter’s aprons provide a vital layer of protection against these airborne particles, shielding the wearer from irritation, injury, and contamination. The full coverage design ensures that particles are unable to come into contact with the wearer’s skin, reducing the risk of cuts, scratches, and abrasions. Moreover, the thick, heavy-duty leather material of the apron provides an additional layer of protection against larger flying objects, such as wood chips and fragments, which can cause more serious injuries if not properly controlled. In addition to physical protection, leather carpenter’s aprons also contribute to a cleaner and more organized workspace. By preventing dust, debris, and other contaminants from coming into contact with the wearer’s clothing, aprons help maintain a hygienic and professional environment in the workshop. This not only enhances the safety and well-being of the craftsmen but also promotes a positive image of professionalism and quality to clients and visitors.
Protection Against Heat and Flames
In addition to physical hazards, carpenters also face the risk of heat and flames in the workshop, particularly when working with power tools and machinery. Sparks, hot metal, and open flames can pose a significant risk of burns and injuries if not properly managed. Leather carpenter’s aprons are specifically designed to withstand high temperatures and provide protection against heat and flames. The thick, natural fibers of the leather act as an insulating barrier, helping to prevent heat from penetrating through to the wearer’s skin. Additionally, the apron’s full coverage design ensures that vulnerable areas of the body are shielded from direct exposure to flames and hot surfaces, further reducing the risk of burns and injuries. Leather carpenter’s aprons also offer thermal insulation, helping to regulate body temperature and prevent overheating in hot working environments. This can be particularly beneficial in summer months or in workshops without adequate ventilation, where temperatures can soar to uncomfortable levels. By keeping the wearer cool and comfortable, aprons contribute to overall worker well-being and productivity, ensuring that craftsmen can perform at their best regardless of external conditions.
Comfort and Mobility
While protection is paramount, comfort and mobility are also essential considerations when choosing safety equipment for carpentry work. Leather carpenter’s aprons are designed with these factors in mind, providing a balance of protection and comfort that allows carpenters to work safely and efficiently. The soft, supple leather material conforms to the wearer’s body over time, providing a comfortable and customized fit that does not impede range of motion or dexterity. Additionally, the adjustable straps and buckles allow carpenters to customize the fit of their apron to suit their individual preferences, ensuring maximum comfort and mobility during long hours of work. Leather carpenter’s aprons are lightweight and flexible, allowing for unrestricted movement and agility in the workshop. Unlike some other types of PPE, which can be bulky and cumbersome, aprons are comfortable to wear for extended periods, minimizing fatigue and discomfort. This allows craftsmen to focus more on their work and less on their protective gear, resulting in increased productivity and efficiency in the workshop.
The Versatility and Durability of Leather Aprons
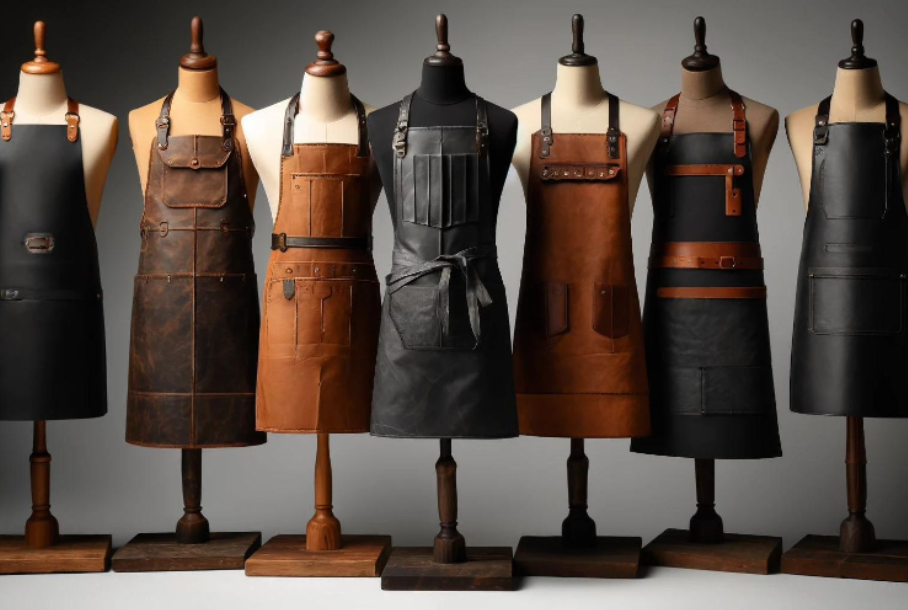
A leather apron is a versatile and durable garment essential for various trades and industries, providing unparalleled protection and style. Crafted from high-quality leather, these aprons offer superior defense against cuts, scratches, and stains, making them indispensable safety gear for craftsmen, chefs, and artisans. The durability of leather ensures that these aprons withstand the rigors of daily use, maintaining their effectiveness and appeal over time. Moreover, the leather apron exudes timeless elegance and sophistication, adding a touch of style to any outfit. Whether customized with logos or worn as a fashion statement, leather aprons epitomize quality, durability, and timeless elegance, making them a staple in any professional or hobbyist’s wardrobe.
Durability and Longevity
In the demanding environment of the carpentry workshop, durability and longevity are essential qualities in safety equipment. Leather carpenter’s aprons are renowned for their durability and longevity, making them a wise investment for carpenters looking to protect themselves for years to come. The thick, heavy-duty leather material is resistant to tears, punctures, and abrasions, ensuring that the apron remains intact and functional even in the face of harsh conditions. With proper care and maintenance, a leather carpenter’s apron can provide reliable protection and peace of mind to craftsmen for many years, making it a cost-effective and practical choice for workplace safety. Leather carpenter’s aprons are also resistant to wear and tear, ensuring that they maintain their protective properties even after prolonged use. Unlike some other types of PPE, which may degrade or deteriorate over time, aprons are designed to withstand the rigors of daily use in the workshop, providing consistent and reliable protection for the wearer. This durability makes them an excellent long-term investment for carpenters looking to prioritize safety and quality in their work.
Boosting Confidence and Morale
In addition to the physical benefits, leather carpenter’s aprons also offer psychological benefits to the wearer, boosting confidence, and morale in the workshop. Knowing that they are properly protected against the various hazards of carpentry can give craftsmen peace of mind and reassurance as they go about their work. This increased confidence can lead to improved focus, productivity, and job satisfaction, as carpenters are able to concentrate on their tasks without worrying about their safety. Additionally, the rugged, professional appearance of leather aprons can instill a sense of pride and identity in craftsmen, reinforcing their role as skilled professionals in their trade. Leather carpenter’s aprons are more than just protective gear; they are a symbol of craftsmanship, dedication, and professionalism in the woodworking trade. By wearing an apron, craftsmen not only protect themselves from physical harm but also demonstrate their commitment to safety and excellence in their work. This sense of pride and identity can have a positive impact on morale and camaraderie in the workshop, fostering a culture of safety, teamwork, and professionalism among craftsmen.
Conclusion:
In conclusion, leather carpenter’s aprons play a crucial role in enhancing workplace safety in carpentry workshops. By providing protection against cuts, abrasions, flying debris, heat, and flames, these aprons help to mitigate the various risks and hazards encountered in the woodworking trade. Additionally, their comfort, durability, and psychological benefits make them an indispensable accessory for carpenters of all skill levels. Whether cutting, sanding, drilling, or assembling, carpenters can work with confidence and peace of mind, knowing that they are properly protected by their trusty leather aprons. As such, prioritizing the use of leather carpenter’s aprons is essential for maintaining a safe and productive working environment in carpentry workshops around the world.
FAQs
1. Are leather carpenter’s aprons suitable for all types of carpentry work?
Yes, leather carpenter’s aprons are designed to provide protection against a wide range of hazards encountered in carpentry, including cuts, abrasions, flying debris, heat, and flames. They are suitable for use in all types of carpentry work, from basic woodworking tasks to more specialized projects.
2. How do I choose the right size leather carpenter’s apron?
When choosing a leather carpenter’s apron, it’s essential to consider your body size and the level of coverage you need. Look for aprons with adjustable straps and buckles to ensure a comfortable fit, and consider the length and width of the apron to ensure adequate coverage.
3. How do I clean and maintain my leather carpenter’s apron?
To clean your leather carpenter’s apron, simply wipe it down with a damp cloth to remove any dirt or debris. Avoid using harsh chemicals or cleaners, as these can damage the leather. Periodically conditioning the leather with a leather conditioner will help keep it supple and hydrated, prolonging its lifespan.
4. Can leather carpenter’s aprons be customized with logos or initials?
Many manufacturers offer customization options for leather carpenter’s aprons, allowing you to add your logo, initials, or other designs. This not only adds a personal touch but also helps promote brand identity or reflect your individual style.
5. Are leather carpenter’s aprons suitable for use in other industries besides carpentry?
While leather carpenter’s aprons are specifically designed for use in carpentry, they are also suitable for a variety of other industries and applications, including metalworking, gardening, home repairs, and DIY projects. Their durable construction and ample coverage make them well-suited to tasks that involve exposure to dirt, debris, and potential hazards.

Introduction to Eclipse Viewing
Observing a solar eclipse is a captivating experience that draws the attention of many sky enthusiasts and curious onlookers. However, it is crucial to emphasize the importance of using proper eye protection when viewing such events. The sun’s powerful rays can cause significant and irreversible damage to the eyes if observed directly without adequate protection.
When the sun’s light is partially or fully obscured during an eclipse, it may seem safe to look at it directly. However, even during these moments, the intense ultraviolet (UV) and infrared (IR) radiation can damage the retina, leading to conditions such as solar retinopathy. Solar retinopathy occurs when the retina is damaged by prolonged exposure to solar radiation, potentially resulting in permanent vision impairment.
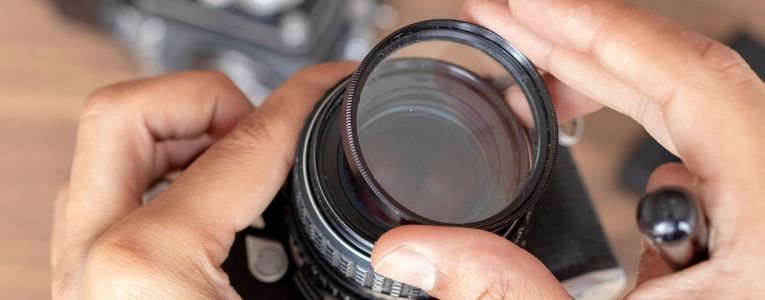
Eclipse glasses are specially designed to mitigate these risks. They are equipped with a particular type of solar filter that blocks out the majority of harmful UV and IR rays, allowing viewers to safely observe the celestial event. These glasses are made from specialized materials that meet international safety standards, ensuring a safe viewing experience.
In this guide, we will delve into the details of how to make eclipse glasses yourself. By following these precise instructions, you can create a pair of eclipse glasses that will provide the necessary protection for your eyes, allowing you to enjoy the beauty of a solar eclipse without the associated dangers. Understanding the importance of eye safety and the role of eclipse glasses is the first step in preparing for a safe and enjoyable eclipse viewing experience.
Materials Needed
Creating homemade eclipse glasses necessitates a collection of specific materials to ensure both functionality and safety. Here is a comprehensive list of essential items required for this project:
Solar Filter Film: The most critical component is solar filter film. It is imperative to use solar filter film that meets the ISO 12312-2 international safety standards for direct viewing of the sun. This certification ensures the film adequately protects your eyes from harmful solar radiation. Sources for ISO 12312-2 certified solar filter film include reputable vendors such as astronomy equipment suppliers, specialized online stores, and scientific institutions.
Cardboard: Sturdy cardboard is necessary to create the frame for the eclipse glasses. Cardboard can be sourced from old boxes or purchased from stationery and craft stores. Ensure the cardboard is thick enough to hold the solar filter film securely but not too cumbersome to fold or cut.
Scissors: A reliable pair of scissors is essential for cutting the solar filter film and cardboard to the desired shapes and sizes. Precision is crucial to ensure that the edges are clean and safe.
Tape: Transparent tape is used to attach the solar filter film to the cardboard frame. It is recommended to use a strong adhesive tape to ensure that the film stays securely in place during use.
Ruler: A ruler is necessary for measuring the dimensions of the cardboard and solar filter film accurately. Precision in measurement helps in creating a comfortable and effective pair of eclipse glasses.

By gathering these materials and following the correct procedures, you can create a safe and effective pair of eclipse glasses to enjoy the celestial event. Remember, the quality and safety of the materials, particularly the solar filter film, are paramount to protect your eyesight during the eclipse.
Preparing the Solar Filter Film
To ensure your homemade eclipse glasses are both safe and effective, careful preparation of the solar filter film is crucial. The solar filter film is specifically designed to shield your eyes from harmful solar radiation during an eclipse, so handling it with precision is essential.
First, lay the solar filter film on a flat, clean surface. Avoid placing it on rough or dusty areas to prevent scratches or damage. Use a microfiber cloth to gently clean any debris or fingerprints from the film. This step is important; any imperfections on the film can compromise its ability to block out harmful rays effectively.
Next, measure the dimensions required for your eclipse glasses. Typically, a rectangular piece measuring approximately 5 cm by 10 cm suffices for most DIY glasses; however, adjust these dimensions based on the size of your frames. It’s prudent to measure twice to ensure accuracy before cutting. Use a ruler and a fine-tip marker to lightly mark the cutting lines on the film.
When you’re ready to cut the film, use a pair of sharp, clean scissors. Dull or dirty scissors can cause jagged edges or scratches, which can undermine the film’s protective qualities. Cut along the marked lines with steady, even pressure to ensure clean edges.
Once cut, carefully inspect the film for any signs of damage or imperfections. Hold the film up to a light source; any holes, scratches, or creases will be visible and should be avoided. If the film appears damaged, it is best to cut a new piece rather than risk using compromised material.
By meticulously preparing the solar filter film, you ensure that your eclipse glasses will provide the necessary protection for safe and enjoyable viewing of the solar eclipse. This attention to detail is critical for safeguarding your vision while experiencing this awe-inspiring celestial event.
Creating the Frame

Crafting a secure and comfortable frame is a crucial step in making effective eclipse glasses. The frame, typically made from cardboard, must securely hold the solar filter film while fitting comfortably over your eyes and nose. Here’s a step-by-step guide on how to create this essential component:
First, gather a piece of sturdy cardboard. The dimensions should be approximately 8 inches by 4 inches, allowing enough space to cover both eyes while leaving some room for adjustments. Begin by drawing two rectangles, each measuring 2 inches by 1 inch, spaced about 2 inches apart in the center of the cardboard. These will serve as the eye holes.
Next, carefully cut out the rectangles using a utility knife or scissors. Ensure that the cuts are clean and precise, as jagged edges can be uncomfortable and may affect the stability of the frame. After cutting the eye holes, place the cardboard over your face to check the fit. The holes should align with your eyes, and the cardboard should rest comfortably over the bridge of your nose.
To improve comfort and stability, you can reinforce the edges of the eye holes with tape or glue. This will help prevent the cardboard from fraying and ensure the frame remains sturdy during use. Additionally, consider adding a small piece of foam or padding to the bridge area for extra comfort.
Once the basic frame is in place, it’s time to attach the solar filter film. Cut two pieces of the film slightly larger than the eye holes, ensuring they fully cover the openings. Secure the film to the cardboard using glue or double-sided tape, making sure it is tightly affixed and free of gaps.
Finally, test the fit of the eclipse glasses once more. They should sit comfortably on your face without slipping. If needed, make any final adjustments to the frame to enhance stability and comfort.
By following these steps, you will create a reliable and comfortable frame for your eclipse glasses, ensuring a safe and enjoyable viewing experience.
Assembling your eclipse glasses is a crucial step in ensuring safe solar viewing. Begin by preparing two pieces of cardboard that will serve as the frames. These should be cut to fit comfortably over your eyes. Next, take your solar filter film and cut it into two pieces, each slightly larger than the openings in your cardboard frames. This allows for a secure attachment without leaving any gaps.
Position one piece of the solar filter film over the opening of the first cardboard frame. Make sure the film covers the entire opening, leaving no gaps or loose edges. To secure the film, you can use either tape or glue. If using tape, choose a strong adhesive like duct tape or electrical tape, and carefully apply it around the edges of the film, pressing it firmly to ensure it adheres well to the cardboard. If you prefer glue, opt for a strong, clear-drying adhesive such as a craft glue. Apply a thin line of glue along the edge of the film and press it onto the cardboard, holding it in place until the glue sets.
Repeat this process with the second piece of solar filter film and the second cardboard frame. Once both frames have their solar filters securely attached, allow any glue to dry completely before proceeding to the next step. It is essential to double-check that there are no gaps or loose edges in your assembly. Any small opening can allow unfiltered sunlight to seep through, posing a risk to your eyes during solar observation.
Once you have verified that the solar filter films are securely in place, your eclipse glasses are ready for use. Ensuring a snug and gap-free attachment is paramount for safe and effective solar viewing. With your handmade eclipse glasses, you can now safely enjoy the marvel of a solar eclipse.
Testing the Glasses
Once you have completed the construction of your eclipse glasses, it is crucial to test them to ensure they are safe for viewing the eclipse. Testing the glasses involves multiple steps to verify their effectiveness in blocking harmful solar radiation.
First, inspect the glasses for any visible light leaks. Hold the glasses up to a bright light source, such as a lamp or the sun, and look for any light seeping through the edges or any potential damage to the film. If you notice any light leakage, it is important to address these issues before using the glasses for eclipse viewing.
Next, ensure that the film used in the glasses is securely attached. Any loose or unsecured film can compromise the safety of the glasses. Gently tug on the film to confirm it is firmly in place. If the film shifts or shows any signs of detachment, reattach it using a stronger adhesive or replace it entirely.
After confirming the integrity of the glasses, test them by looking at a bright light source. This can be done by observing a light bulb or the sun briefly. The glasses should block out the majority of the light, allowing only a faint, dim image to pass through. If the light appears too bright or causes discomfort, the glasses are not safe for use and should be discarded.
It is essential to follow safety guidelines during this testing process. Never look directly at the sun without proper eye protection, even momentarily. Ensure that the testing is conducted in a controlled environment, and never use defective glasses for eclipse viewing. By thoroughly testing your eclipse glasses, you can confidently enjoy the celestial event while protecting your eyes from harmful solar radiation.
Using Your Eclipse Glasses

Ensuring the safe use of eclipse glasses is essential for a successful and hazard-free solar eclipse viewing experience. Understanding the correct procedures for wearing, adjusting, and maintaining your glasses is crucial to protect your eyes from potential harm. Here is a detailed guide on how to make eclipse glasses work effectively for your observation.
First and foremost, it is vital to put on your eclipse glasses before looking up at the sun. Never stare directly at the sun without adequate protection, as it can cause irreversible damage to your eyes. Position the glasses securely over your eyes, making sure they cover them entirely. It is advisable to test the fit of your glasses beforehand to avoid any adjustments during the eclipse, which could expose your eyes to direct sunlight.
During the viewing, keep your eclipse glasses on at all times when looking at the sun. If you need to remove them, ensure you look away from the sun first. The temptation to glance at the sun without the glasses, even for a moment, must be resisted, as even short-term exposure to its intense rays can result in severe eye injuries.
To maintain the stability of your eclipse glasses, consider using additional support such as a headband or securing them with tape. This is especially important for children or individuals who may find it challenging to keep the glasses in place. Proper fit and stability are critical to ensuring continuous protection.
Additional safety precautions include avoiding the use of cameras, binoculars, or telescopes while wearing eclipse glasses, unless these devices have their own solar filters. Standard eclipse glasses are not designed for use with optical devices and could lead to concentrated sunlight damaging the filters and your eyes.
By following these guidelines, you can safely enjoy the awe-inspiring event of a solar eclipse. Proper preparation and adherence to safety measures are key to a memorable and safe viewing experience.
Alternative Methods and Precautions
When it comes to safely viewing a solar eclipse, it is essential to consider alternative methods if you do not have eclipse glasses. One effective and simple method is the pinhole projector. This device allows you to view the solar eclipse indirectly, ensuring your eyes are protected from harmful solar radiation.
To make a pinhole projector, you will need a piece of cardboard or thick paper. Poke a small hole in the center of the cardboard using a pin or needle. Stand with your back to the sun and hold the cardboard so that sunlight passes through the hole and projects an image of the sun onto a flat surface, such as another piece of paper or the ground. Adjust the distance between the cardboard and the projection surface to get a clear image. This method is safe, easy to execute, and requires minimal materials.
Another alternative is using welder’s glass. Welder’s glass of shade 14 or higher can be used to view the sun directly. Ensure that the welder’s glass is free from any scratches or defects that could compromise its protective qualities. Using welder’s glass designed for solar viewing is a reliable method, but it is imperative to verify the shade number to ensure adequate protection.
Conclusion: How to Make Eclipse Glasses?
It is crucial to emphasize that regular sunglasses, even those with very dark lenses, do not provide sufficient protection against the intense light and radiation from the sun during an eclipse. Homemade filters, unless they are specifically designed and tested for solar viewing, should also be avoided. Using inadequate protection can result in serious eye damage, including permanent vision loss.
By understanding how to make eclipse glasses and exploring alternative methods like the pinhole projector or welder’s glass, you can safely enjoy observing a solar eclipse. Always prioritize eye safety and ensure any viewing method used meets the recommended safety standards for solar observation.
Before Ending, I’ve noticed your interest in Our Blog. We have covered the topic “How to Sign a Sympathy Card: A Comprehensive Guide” which you can explore on our blog.
Understanding the Purpose of a Sympathy Card
Sending a sympathy card is a deeply meaningful gesture that extends beyond mere words. In times of loss, a sympathy card serves as a conduit for expressing heartfelt condolences, providing solace, and offering unwavering support to those who are grieving. The act of signing a sympathy card is more than a formality; it is an essential means of communicating empathy and compassion during one of life’s most challenging moments.
Sympathy cards fulfill multiple emotional roles. For the recipient, they act as a tangible reminder that they are not alone in their sorrow. The words penned within can provide a sense of comfort and understanding, often offering a small but significant source of solace. Knowing that others are thinking of them and sharing in their grief can be immensely comforting and can foster a sense of community and support.
For the sender, the process of writing a sympathy card can also be therapeutic. It offers a structured way to articulate feelings of sadness and empathy, creating an emotional connection with the bereaved. The sincerity and thoughtfulness embedded in the message can convey a depth of care that verbal expressions might not fully capture. Understanding how to sign a sympathy card appropriately ensures that the message is both respectful and comforting.
Moreover, the importance of sincerity and empathy cannot be overstated. A genuine expression of sympathy, carefully worded and thoughtfully conveyed, can have a lasting impact on the grieving individual. It shows that the sender truly cares and acknowledges the significance of the loss. Whether the card is simple and brief or detailed and elaborate, the key is to ensure that the sentiment remains sincere and empathetic.
In essence, sympathy cards are invaluable tools for fostering emotional support and human connection during times of loss. By understanding their purpose and the emotional benefits they provide, both the sender and the recipient can find a measure of comfort and solace in the shared experience of grief.
Choosing the Right Words

When learning how to sign a sympathy card, selecting the right words is paramount. Crafting a message that conveys your heartfelt condolences while maintaining a tone of compassion and respect can be challenging. However, a few thoughtful guidelines can assist in expressing your sentiments effectively.
First and foremost, simplicity and sincerity are key. Avoid overly complex language or flowery expressions that may seem insincere or forced. A straightforward message often resonates more profoundly. For example, “I am deeply sorry for your loss” or “My thoughts are with you during this difficult time” are simple yet heartfelt statements that convey genuine empathy.
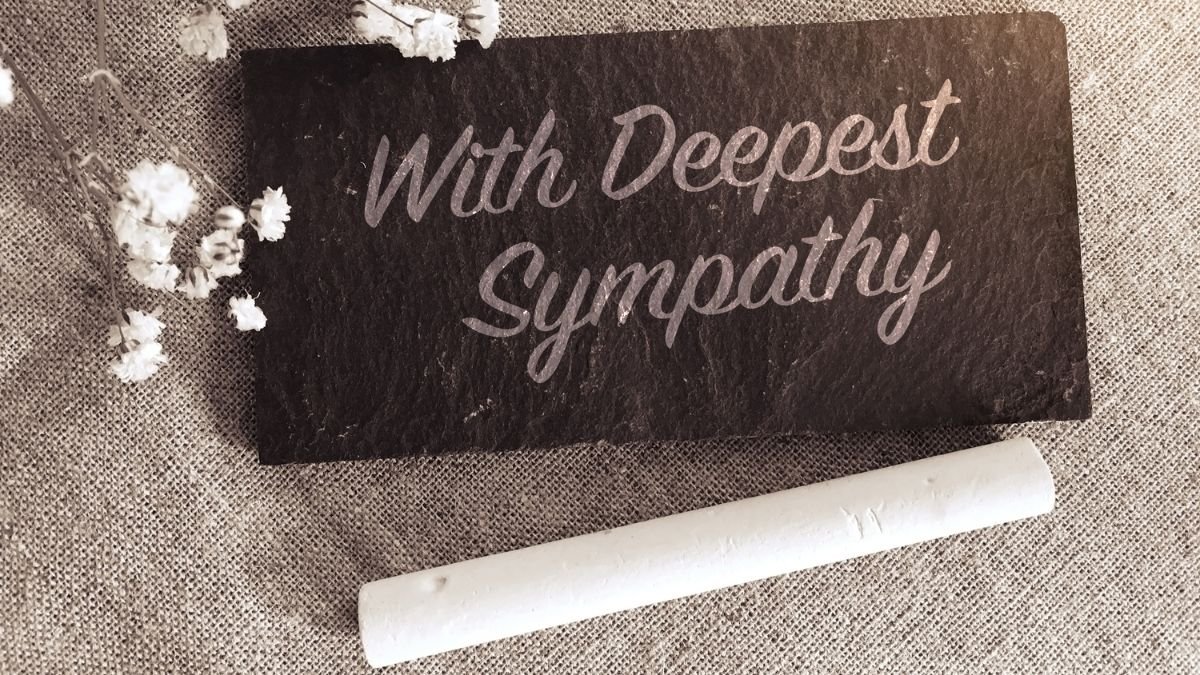
While it’s important to avoid clichés, certain time-honored phrases can still be meaningful if delivered with sincerity. Phrases like “With deepest sympathy” or “Thinking of you” can be comforting when they come from the heart. However, steer clear of statements that may unintentionally minimize the recipient’s grief, such as “They’re in a better place now” or “Everything happens for a reason,” as these can sometimes come across as dismissive.
Personalizing your message is another effective way to show your support. Reflect on your relationship with the deceased and the recipient. Share a cherished memory or a particular quality you admired about the deceased. For instance, “I will always remember John’s kindness and sense of humor” or “Mary’s warmth and generosity touched so many lives.” These personal touches can offer comfort and solace to those who are grieving.
In addition, offering specific support can be very meaningful. Simple offers, such as “Please let me know if there’s anything I can do to help,” can provide a sense of solidarity and practical assistance during a difficult time.
Ultimately, the goal is to convey your compassion and support in a way that feels genuine and respectful. By choosing your words carefully and personalizing your message, you can provide comfort and solace to those who are mourning.
What to Avoid Writing in a Sympathy Card

Understanding how to sign a sympathy card involves not only knowing what to write but also being acutely aware of what to avoid. One of the first pitfalls to steer clear of is making insensitive comments. Statements that might seem benign can often come off as dismissive or hurtful to someone in mourning. Phrases like “I know how you feel” or “They are in a better place” can inadvertently minimize the recipient’s feelings of loss and grief.
Religious assumptions are another area where caution is necessary. While religion can be a source of comfort for many, not everyone shares the same beliefs. Assuming that the recipient finds solace in religious sentiments can be alienating. Instead, opt for neutral expressions of support and sympathy unless you are certain of the recipient’s religious views and would appreciate such sentiments.
Avoid overly positive statements that may unintentionally downplay the gravity of the situation. Comments like “At least they lived a long life” or “Everything happens for a reason” can seem dismissive of the recipient’s current pain. Grief is a deeply personal and often overwhelming experience; thus, the focus should be on acknowledging their loss and offering support.
Respecting the recipient’s feelings and cultural differences is crucial. Different cultures have varied customs and expectations surrounding death and mourning. Being mindful of these differences ensures that your message is both appropriate and considerate. If unsure, it is better to stick to universally accepted expressions of sympathy and compassion.
In summary, when considering how to sign a sympathy card, it is essential to avoid comments that could be perceived as insensitive, making religious assumptions, and overly positive statements. By respecting the recipient’s feelings and cultural background, your message will be more meaningful and comforting during their time of loss.
Final Touches and Presentation

When learning how to sign a sympathy card, the final touches and presentation are crucial in conveying your heartfelt condolences. First and foremost, consider how you will sign off the card. A simple, respectful closure such as “With deepest sympathy,” “Thinking of you,” or “With heartfelt condolences” is appropriate. Adding your full name ensures clarity, especially if you’re not in regular contact with the recipient.
In addition to your message, you might consider including a small token of sympathy. A sympathy gift or flowers can provide additional comfort, showing that your thoughts extend beyond words. However, this is optional and should be based on your relationship with the bereaved and their preferences.
Deciding how to deliver the card is another important aspect. If possible, delivering the card in person can add a personal touch and offer an opportunity for a supportive gesture, such as a hug. If in-person delivery isn’t feasible, mailing the card is entirely acceptable. Ensure the card is sent promptly to avoid delays in offering your condolences.
Neat handwriting is essential when signing a sympathy card. Take your time to write clearly and legibly, as a well-presented message can be comforting. If your handwriting is difficult to read, consider typing your message and attaching a printed note inside the card.
Choosing a suitable card design is also significant. Opt for simple, elegant designs that reflect the solemnity of the occasion. Avoid overly bright or whimsical designs, as they may not convey the appropriate tone for expressing sympathy.
Conclusion: How to Sign a Sympathy Card
Finally, the overall presentation of the card should be respectful and thoughtful. Ensure the envelope is addressed correctly and consider using high-quality stationery to reflect the sincerity of your message. These small details can make a significant difference in how your gesture is received and appreciated by the grieving family.
Before Ending, I’ve noticed your interest in Our Blog. We have covered the topic “Understanding Capture Portals: A Comprehensive Guide” which you can explore on our blog.
Entertainment
Interview with a Fashion Influencer: How They Style Red and White Pieces, as Seen on Blog Red and White Magz

Introduction to the Fashion Influencer and Their Style
Step into the vibrant world of fashion with Blog RedandWhiteMagz as we dive into an exclusive interview with a fashion influencer known for their impeccable style in red and white pieces. Get ready to uncover insider tips, tricks, and inspiration on how to rock this classic color combo like a true trendsetter!
Tips for Styling Red and White Pieces
When it comes to styling red and white pieces, the key is balance. Mix bold red with crisp whites for a fresh look that pops. Pair a classic white button-down shirt with vibrant red trousers for a chic ensemble that transitions seamlessly from day to night.
Try layering different shades of red and white for added dimension. A crimson jacket over an ivory dress can create a striking contrast that commands attention. Don’t be afraid to experiment with patterns either – think stripes, polka dots, or floral prints in these two timeless colors.
Accessorize thoughtfully – opt for gold jewelry to add warmth to your outfit or choose sleek silver accents for a modern touch. A statement handbag or killer heels in red can elevate any simple white ensemble instantly.
Remember, confidence is key when rocking bold colors like red and white. Own your look and wear it with pride!
The Power of Accessories: Elevating a Red and White Look
Accessories play a crucial role in transforming a red and white outfit from ordinary to extraordinary. A statement necklace or bold earrings can instantly add a pop of color and personality to your ensemble. Consider pairing a classic red dress with white pumps and a sleek clutch for an elegant touch.
A chic belt can cinch the waist of a flowy white top worn with red pants, creating a flattering silhouette. Don’t underestimate the power of sunglasses or a stylish hat to elevate your look effortlessly. Mixing textures like leather, silver, or even straw can bring depth and interest to your outfit.
Experiment with different accessories such as scarves, gloves, or even socks in complementary colors to showcase your unique style. Remember, less is sometimes more; choose one standout accessory that ties the whole look together seamlessly. Accessories are the finishing touches that complete your red and white fashion statement!
Conclusion: Embracing the Versatility of Red and White in Fashion
Red and white pieces are timeless staples in fashion that can be styled in countless ways to create diverse looks. By following the expert tips from our fashion influencer and understanding the power of accessories, you can elevate your red and white outfits to new heights. Embrace the versatility of these classic colors, experiment with different styles, and let your creativity shine through in every outfit you wear. Whether you’re going for a bold statement or a subtle touch of color, red and white pieces are sure to make a lasting impression in any wardrobe. So go ahead, mix and match, have fun with it, and discover the endless possibilities that red and white fashion has to offer!


The Positive Impact of Social Media on People: Is Everything That Great?

Geekzilla.tech Honor Magic 5 Pro – A Complete Overview
How to Make Eclipse Glasses: A Step-by-Step Guide

What is Masqlaseen? A Complete Overview

What is Moye Moye? Understanding the Serbian Phrase and its Meaning

What is soymamicoco? A Complete Guide
-
 Entertainment6 months ago
What is Masqlaseen? A Complete Overview
-
 Entertainment5 months ago
What is Moye Moye? Understanding the Serbian Phrase and its Meaning
-
 Entertainment5 months ago
What is soymamicoco? A Complete Guide
-

 Entertainment4 months ago
Is Ztec100.com Your One-Stop Shop for Digital Solutions?
-

 Entertainment4 months ago
What is 06shj06? – Uncover The Mystery
-
 Technology4 months ago
What is an XCV Panel? A Guide to Its Uses and Benefits
-

 Entertainment4 months ago
Who is Elon Musk? – Unveiling the Visionary Entrepreneur
-
 Business4 months ago
What is Roadget Business?
Pingback: Using Leather Carpenters Aprons to Increase Workplace Safety in Carpentry - fashionistglam.com