Entertainment
What is Masqlaseen? A Complete Overview
Contents
Introduction
When we hear the word “Masqlaseen,” it is natural to be intrigued by its multiple meanings and associations. In different contexts, it can refer to a divine title, a laser treatment, a culinary delight, an ancient civilization, or even an enchanting mythical realm. However, the most authentic and captivating interpretation of Masqlaseen lies in its connection to a place, a people, and a cherished tradition in Morocco.
Masqlaseen is a Moroccan term that relates to a city, a people, and a tradition. The city is a spiritual center for Sufis who practice healing rituals and express their art. The people are an ancient civilization that created masks, pottery, jewelry, and textiles. The tradition is a symbol of resilience, diversity, and creativity. Masqlaseen is a source of inspiration for spiritual and cultural seekers.
The Mystical City of Masqlaseen

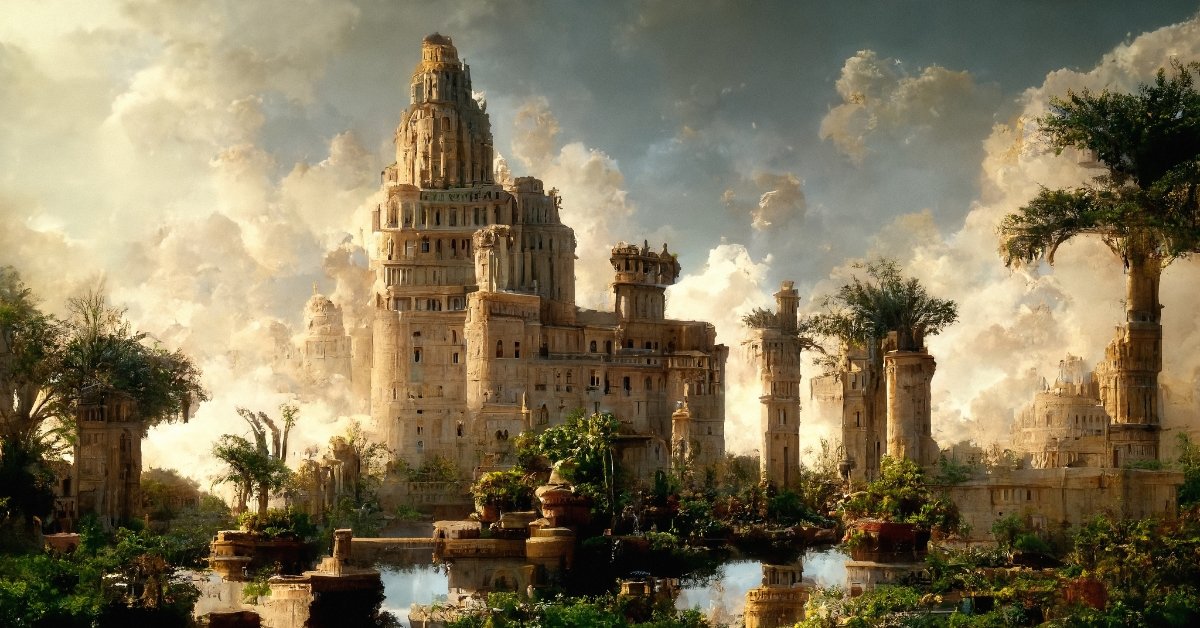
In the heart of Morocco, there exists a city named Masqlaseen, which serves as a spiritual center for a mystical order of Sufis. These Sufis engage in profound healing rituals and passionately express their devotion through poetry, music, and art. Masqlaseen, with its vibrant energy and spiritual ambiance, attracts seekers from all corners of the world, drawn by the promise of spiritual enlightenment and inner peace.
The Ancient Masqlaseen Culture

Prior to the advent of Islam, the region where Masqlaseen now stands was home to an ancient civilization known as Masqlaseen. This remarkable culture left behind a legacy of exquisite masks, pottery, jewelry, and textiles, showcasing their exceptional craftsmanship and artistic prowess. The artifacts discovered from this era provide a glimpse into the rich and diverse history of Masqlaseen, reflecting the ingenuity and creativity of its people.
A Symbol of Resilience

Throughout the centuries, Masqlaseen has endured numerous challenges and transformations, yet it has managed to preserve its essence and cultural heritage. The city stands as a symbol of resilience, reminding us of the strength and tenacity of its inhabitants. The traditions, rituals, and artistic expressions of Masqlaseen continue to thrive, passing down from one generation to the next, ensuring that the legacy of this remarkable place lives on.
Exploring Masqlaseen Today

For those fortunate enough to visit Masqlaseen, the experience is nothing short of enchanting. The city’s narrow streets are adorned with vibrant colors, intricate mosaics, and the aroma of spices wafting through the air. Visitors can immerse themselves in the spiritual practices of the Sufis, witnessing their mesmerizing rituals and engaging in soul-stirring music and poetry sessions.
Beyond the spiritual realm, Masqlaseen offers a feast for the senses. Indulge in the tantalizing flavors of traditional Moroccan cuisine, with Masqlaseen’s unique dishes tantalizing the taste buds. From aromatic tagines to delicate pastries, every bite is a celebration of the region’s culinary artistry.
The Magic of Masqlaseen

While Masqlaseen’s historical and cultural significance is undeniable, there is also a mystical allure associated with the name. Some legends speak of Masqlaseen as a magical land, hidden from the eyes of ordinary mortals. It is said that those who possess a pure heart and unwavering faith may stumble upon the entrance to this enchanted realm, where dreams come to life and miracles unfold.
Conclusion
Masqlaseen, with its multifaceted meanings and interpretations, encapsulates the beauty of Morocco’s history, spirituality, and artistic expression. Whether it is the mystical city where Sufis practice their healing rituals, the ancient civilization that produced awe-inspiring artifacts, or the enchanting realm of legends, Masqlaseen continues to captivate the imagination of all who encounter its name. It serves as a reminder of the enduring power of culture and the human spirit, inspiring us to embrace our own unique traditions and celebrate the diversity that enriches our world.
You can Find More These Types of Article At: Masqlaseen.com
Post Disclaimer
The information contained in this post is for general information purposes only. The information, including images, is provided by What is Masqlaseen? A Complete Overview, and while we endeavor to keep the information accurate, we make no representations or warranties of any kind, express or implied, about the completeness, accuracy, reliability, suitability, or availability with respect to the website or the information, products, services, or related graphics contained on the post for any purpose. Please note that images used in this post may be included for entertainment purposes and do not necessarily represent factual or real-life scenarios.
Entertainment
What is the 1555 Portrait of Servais in Germany? A Glimpse into Renaissance Art and Society

The 1555 portrait of Servais in Germany is a notable example of Northern Renaissance art, capturing the likeness of Heinrich Servais with exceptional realism and detail. This portrait, housed at Berlin’s Gemäldegalerie, showcases not only the artist’s technical skill but also serves as a window into the societal values and cultural trends of 16th-century Germany. Through the use of techniques like chiaroscuro (the play of light and shadow), this painting emphasizes Servais’s status, wealth, and intellectual pursuits, which were essential markers of social standing during the Renaissance. With its blend of German and Flemish artistic influences, the 1555 portrait offers a vivid representation of Renaissance ideals, societal hierarchies, and the individual’s role within the broader cultural framework.
Contents
- 1 Historical Background of the 1555 Portrait of Servais
- 2 Artistic Techniques in the 1555 Portrait of Servais
- 3 Cultural Significance and Symbolism
- 4 The Legacy of the 1555 Portrait of Servais
- 5 Pros and Cons of the 1555 Portrait of Servais
- 6 Benefits of Studying the 1555 Portrait of Servais
- 7 Quick Tips for Appreciating Renaissance Portraits like the 1555 Portrait of Servais
- 8 FAQ: Common Questions about the 1555 Portrait of Servais
- 9 Definition Box: Key Terms
- 10 Conclusion: The 1555 Portrait of Servais and Its Renaissance Legacy
Historical Background of the 1555 Portrait of Servais
1. The Subject: Heinrich Servais
Heinrich Servais, the subject of this 1555 portrait, was an influential figure within his society. His portrayal reflects the Renaissance’s emphasis on capturing individuals of note and intellectual achievement. As portraits during this time often symbolized social and intellectual stature, the 1555 portrait of Servais reveals a great deal about his personal status, scholarly pursuits, and impact on the cultural fabric of his time.
2. Renaissance Portraiture in Germany
The 1555 portrait of Servais in Germany is an important example of how Renaissance art in Germany developed, especially as artists began incorporating elements of realism and symbolism. This work embodies the values and artistic developments of the Northern Renaissance, which differed from the Italian Renaissance by focusing on realism, meticulous detail, and an exploration of social and intellectual themes.
Artistic Techniques in the 1555 Portrait of Servais
3. Use of Chiaroscuro to Create Depth
A defining characteristic of the 1555 portrait of Servais is the use of chiaroscuro, a technique that manipulates light and shadow to enhance depth and realism. By carefully contrasting light and dark areas, the artist captures Servais’s facial features with remarkable depth, providing a lifelike quality that engages viewers. This technique is emblematic of Northern Renaissance art, where artists aimed to achieve a realistic portrayal that celebrated human detail.
4. Emphasis on Textures and Fabrics
The artist’s attention to textures, particularly in Servais’s attire and accessories, demonstrates technical skill while also symbolizing social status. Luxurious fabrics, intricate embroidery, and fine jewelry are detailed with precision, emphasizing Servais’s wealth and position within society. During the Renaissance, such visual cues were intentional, as they communicated social hierarchies and personal achievements to viewers.
Cultural Significance and Symbolism
5. Blend of German and Flemish Artistic Traditions
The 1555 portrait of Servais in Germany exemplifies a blend of German and Flemish influences. While German art of this period was known for its symbolic depth, Flemish art contributed meticulous attention to detail. This fusion is evident in the portrait, where symbolic items like books and luxurious fabrics hint at Servais’s scholarly pursuits and noble status.
6. Reflection of 16th-Century Societal Values
Renaissance portraits, such as this one, were not merely decorative; they were laden with cultural and societal meaning. The 1555 portrait of Servais highlights intellectual achievement, personal status, and an individual’s place within society. By integrating books and symbolic objects into the composition, the artist conveys Servais’s scholarly interests, providing insights into the intellectual values of the period.
The Legacy of the 1555 Portrait of Servais
7. Current Location and Public Access
Today, the 1555 portrait of Servais is displayed in Berlin’s Gemäldegalerie, one of the foremost galleries for European painting. Here, visitors can view this Renaissance masterpiece, gaining a deeper understanding of the artistic and cultural dynamics of 16th-century Germany. Its presence in such a renowned collection reflects its importance as a historical artifact and a work of art.
8. Influence on Modern Perceptions of Renaissance Art
The 1555 portrait of Servais continues to inspire contemporary audiences, historians, and artists alike. As a meticulously crafted representation of Northern Renaissance style, this work offers invaluable insights into the artistic techniques, cultural values, and societal structures of its time. Through exhibitions and discussions, the portrait maintains its place in the study of Renaissance art, illustrating how personal and societal identity were portrayed through artistic expression.
Pros and Cons of the 1555 Portrait of Servais
| Pros | Cons |
|---|---|
| Provides a realistic depiction of Servais’s social status | Limited background information on artist identity |
| Rich in symbolic elements reflecting Renaissance values | Interpretations may vary due to subjective symbolism |
| Merges Flemish detail with German symbolism | Limited appeal outside historical or artistic interests |
| Educational value for Renaissance studies | Requires context for full appreciation of cultural significance |
Benefits of Studying the 1555 Portrait of Servais
- Understanding Renaissance Techniques: Highlights techniques like chiaroscuro that define the era.
- Cultural and Societal Insights: Offers a glimpse into 16th-century values around wealth, status, and intellectual pursuit.
- Symbolic Depth: Incorporates items that reveal Servais’s personal and scholarly achievements, characteristic of Northern Renaissance art.
- Blend of Artistic Traditions: Demonstrates the merging of German and Flemish styles, which was instrumental in Renaissance art.
Quick Tips for Appreciating Renaissance Portraits like the 1555 Portrait of Servais
- Look for Symbolic Elements: Items such as books or luxurious fabrics often convey information about the subject’s status or achievements.
- Observe Use of Light and Shadow: Chiaroscuro is a signature technique in Northern Renaissance art that adds depth to the portrait.
- Consider Cultural Context: Understanding the social structure of the 16th century enhances appreciation for the artwork’s message.
- Explore Blended Styles: Notice how German symbolism and Flemish detail work together to add complexity to the portrait.
FAQ: Common Questions about the 1555 Portrait of Servais
1. Who is depicted in the 1555 portrait of Servais?
The portrait depicts Heinrich Servais, a figure of influence in 16th-century German society, highlighting his wealth, intellectual pursuits, and social standing.
2. What artistic techniques are used in the portrait?
The portrait employs chiaroscuro (light and shadow) to create depth and realism, along with meticulous attention to textures, reflecting the artist’s skill and Renaissance ideals.
3. Where can I view the 1555 portrait of Servais?
The portrait is currently housed at the Gemäldegalerie in Berlin, where it is accessible to the public as part of a collection of European masterpieces.
4. Why is the portrait culturally significant?
The portrait reflects Renaissance values, showcasing Heinrich Servais’s status and intellectual achievements, and blending German and Flemish art styles.
5. How does this portrait illustrate Renaissance art?
By emphasizing realism, symbolic depth, and social hierarchy, the 1555 portrait of Servais embodies key aspects of Northern Renaissance art.
6. What is chiaroscuro, and why is it important in this portrait?
Chiaroscuro is a technique that uses light and shadow to create depth. In this portrait, it enhances Servais’s facial features and adds to the lifelike quality, a hallmark of Renaissance art.
Definition Box: Key Terms
Chiaroscuro
A technique in painting that uses contrasting light and shadow to create a sense of depth and three-dimensionality, widely used during the Renaissance.
Northern Renaissance
A phase of the broader European Renaissance that took place in Northern Europe, particularly known for its emphasis on realism, detail, and symbolism.
Conclusion: The 1555 Portrait of Servais and Its Renaissance Legacy
The 1555 portrait of Servais in Germany serves as a powerful example of Northern Renaissance art, combining realism, symbolic depth, and the influence of German and Flemish traditions. Through techniques like chiaroscuro, the artist captures Servais’s social status and intellectual pursuits, offering a detailed portrayal of an influential figure from 16th-century Germany. This portrait stands as both an artistic achievement and a historical document, illuminating the values and societal structures of the Renaissance. Today, visitors at Berlin’s Gemäldegalerie can appreciate its continued relevance, as it brings to life the culture, artistry, and legacy of an era that shaped European art and society.
Post Disclaimer
The information contained in this post is for general information purposes only. The information, including images, is provided by What is the 1555 Portrait of Servais in Germany? A Glimpse into Renaissance Art and Society, and while we endeavor to keep the information accurate, we make no representations or warranties of any kind, express or implied, about the completeness, accuracy, reliability, suitability, or availability with respect to the website or the information, products, services, or related graphics contained on the post for any purpose. Please note that images used in this post may be included for entertainment purposes and do not necessarily represent factual or real-life scenarios.

Sven Co-op is a cooperative multiplayer modification for the popular Half-Life game that has been captivating gamers for years. The game allows players to team up and fight against computer-controlled enemies, solve puzzles, and explore detailed maps together. A significant part of enhancing this multiplayer experience is through the use of game icons and banners, which have evolved significantly in 2024. These visual elements play a crucial role in both gameplay and community engagement.
Contents
Understanding Sven Co-op Icons

Icons in Sven Co-op serve multiple purposes and are a fundamental part of the gaming interface. They are small graphic symbols that provide players with information about their status, objectives, and available actions. There are several types of icons used in the game:
- Standard Icons: These are the default icons that provide essential in-game information, such as health, ammunition, and weapon status. Icons like health indicators and ammo counters help players keep track of vital statistics during gameplay.
- Special Event Icons: Designed specifically for special in-game events or seasonal celebrations, these icons add a unique aesthetic to the game. For example, there are spooky icons for Halloween events and festive icons for Christmas. These icons can transform the gaming atmosphere and make the experience more immersive during special events.
- Custom Icons Created by the Community: The Sven Co-op community is known for its creativity, and custom icons are a testament to that. These icons are often created by players themselves, reflecting their preferences or aligning with specific themes like pop culture or franchises. Themed packs or collaborative icon projects are quite popular among the community, contributing to the game’s diversity and richness.
Key Principles of Icon Design

Designing effective game icons involves adhering to several key principles:
Clarity: Icons must be easily recognizable at a glance.
Consistency: Similar design elements should be maintained across different icons to ensure uniformity.
Simplicity: Overly complex designs can confuse players, so simplicity is key.
Scalability: Icons should maintain quality and clarity, even when resized.
Popular tools for creating icons include Adobe Illustrator, Photoshop, GIMP, and Inkscape, which offer a range of features for both beginners and advanced designers.
Exploring Sven Co-op Banners

Game banners in Sven Co-op serve a broader purpose compared to icons. They are larger visual elements that enhance the game’s aesthetic and serve practical roles like displaying important announcements or information.
- Standard Banners: These are used in various parts of the game, such as the main menu, loading screens, or in-game notifications. They are usually designed to match the overall theme and tone of the game, ensuring a cohesive look.
- Event-Specific Banners: Similar to event icons, these banners are created to celebrate specific in-game events, like holidays or community milestones. They help in enhancing the game’s atmosphere during these special events.
- Community-Created Banners: Like icons, the community also creates custom banners that are often themed around popular culture or personalized for specific groups or events. These banners are widely used in promotional activities or on social media to engage the player community.
Designing Effective Game Banners
Effective banner design, like icon design, follows certain principles:
Visual Hierarchy: The arrangement of elements to guide the viewer’s attention.
Balance: A harmonious distribution of visual elements.
Contrast: Using contrasting colors to highlight essential information.
Typography: Selecting readable and appropriate fonts for text elements.
Tools like Adobe Photoshop, Canva, Affinity Designer, and CorelDRAW are popular choices for creating high-quality game banners.
Benefits of Well-Designed Icons and Banners

Icons and banners play a significant role in enhancing the overall user experience in Sven Co-op:
Enhanced User Experience: Well-designed icons and banners make navigation easier and provide clarity, contributing to a more enjoyable gaming experience.
Community Engagement: By allowing players to create and share their custom designs, the game fosters a strong community spirit. Design contests, custom creations, and other activities encourage players to contribute and engage actively.
Promotional Uses: Icons and banners are also effective for marketing campaigns, social media engagement, and enhancing the game’s website. These visuals can attract new players and keep the existing community engaged by providing a visually appealing and informative environment.
Future of Icons and Banners in Sven Co-op
The future of icons and banners in Sven Co-op looks promising, with technological advancements and increased community involvement leading to higher-quality visuals. The adoption of advanced design tools and the introduction of community-created content are expected to bring more diverse and innovative designs to the game in 2024.
Conclusion
Icons and banners are more than just decorative elements in Sven Co-op; they are essential tools for enhancing the game’s visual appeal, improving user experience, and fostering a strong community spirit. With the continuous evolution of the game and the creative efforts of its community, Sven Co-op will likely see even more innovative and engaging designs in the coming years.
Before Ending, I’ve noticed your interest in Our Blog. We have covered the topic “What is Geekzilla Tio Geek?,” which you can explore on our blog.
Post Disclaimer
The information contained in this post is for general information purposes only. The information, including images, is provided by What is Sven Co-op Game Icons and Banners?, and while we endeavor to keep the information accurate, we make no representations or warranties of any kind, express or implied, about the completeness, accuracy, reliability, suitability, or availability with respect to the website or the information, products, services, or related graphics contained on the post for any purpose. Please note that images used in this post may be included for entertainment purposes and do not necessarily represent factual or real-life scenarios.

The digital era has transformed how we consume content, and for manga enthusiasts, online platforms have become a haven for reading the latest chapters and exploring various genres. One such platform that has gained significant traction is Mureadingmanga. This article delves into what Mureadingmanga is, its unique offerings, the benefits it provides to manga lovers, and the role it plays in the digital manga community in 2024.
Contents
What is Mureadingmanga?

Mureadingmanga is an online platform dedicated to manga, providing readers with access to a vast collection of manga titles spanning multiple genres. From action, adventure, and romance to fantasy, horror, and slice of life, Mureadingmanga caters to a diverse audience of manga enthusiasts. The website is designed to offer a user-friendly experience, with intuitive navigation, easy access to chapters, and a range of features that enhance the reading experience.
Key Features of Mureadingmanga

- Extensive Manga Library: One of the most notable features of Mureadingmanga is its extensive library. The platform hosts thousands of manga titles from popular series to lesser-known gems, ensuring readers have access to a wide range of content. Whether you are a fan of mainstream manga or prefer indie stories, Mureadingmanga has something to offer.
- User-Friendly Interface: The platform prides itself on its user-friendly interface, making it easy for readers to browse through genres, search for specific titles, or discover new releases. The clean design and straightforward layout allow users to focus on reading without unnecessary distractions.
- Regular Updates: Mureadingmanga is known for providing regular updates to its collection. New chapters are uploaded as soon as they are available, allowing readers to stay up to date with their favorite series. This commitment to timely updates is one of the reasons for the platform’s growing popularity.
- High-Quality Scans and Translations: Quality is a top priority for Mureadingmanga. The platform offers high-quality scans that are clear and easy to read. Additionally, translations are accurate and maintain the essence of the original content, providing an authentic reading experience.
- Bookmark and Save Options: For avid readers who like to keep track of their progress, Mureadingmanga offers bookmarking and saving options. This feature allows users to save their place in a chapter or mark their favorite series for easy access in the future.
- Community Engagement: Mureadingmanga fosters a sense of community among its users. Readers can engage in discussions, leave comments, and share their thoughts on different chapters. This interactive element adds to the overall experience, allowing fans to connect with like-minded individuals.
Why Choose Mureadingmanga?
In the crowded world of online manga platforms, Mureadingmanga stands out for several reasons:
Diverse Content: With thousands of titles available, Mureadingmanga caters to a wide range of tastes. Whether you’re a fan of action-packed shonen, heartwarming shojo, or thought-provoking seinen, there is something for everyone.
Accessibility: The platform is accessible on various devices, including smartphones, tablets, and desktops. This flexibility allows users to read manga anytime and anywhere.
Free Access: Mureadingmanga provides free access to its vast collection of manga titles. While some platforms require a subscription or payment, Mureadingmanga allows readers to enjoy their favorite series without any financial commitment.
Legal and Safe: Unlike some unauthorized manga sites, Mureadingmanga prioritizes the legality of its content, ensuring that it operates within copyright laws and provides a safe environment for its users.
The Rise of Digital Manga Reading in 2024

As of 2024, digital manga reading has become increasingly popular, with platforms like Mureadingmanga playing a crucial role in this growth. The convenience of online reading, coupled with the increasing availability of translated content, has made it easier for global audiences to access and enjoy manga. Platforms like Mureadingmanga also help bridge the gap between different cultures by providing translated versions of Japanese manga, making the stories more accessible to a broader audience.
Challenges and Opportunities
While Mureadingmanga has established itself as a reputable platform, it faces several challenges, such as competition from other manga sites and the ongoing battle against piracy. To maintain its position, Mureadingmanga must continue to innovate and offer unique features that enhance the user experience.
However, these challenges also present opportunities. By collaborating with manga publishers and creators, Mureadingmanga can offer exclusive content and special releases that attract more users. Additionally, the platform can explore monetization strategies that support creators while keeping the content accessible to readers.
The Future of Mureadingmanga
Looking ahead, Mureadingmanga aims to expand its library further, incorporating more genres, indie works, and even webtoons. The platform plans to introduce new features, such as personalized recommendations, enhanced community interactions, and possible integration with anime streaming services. By staying adaptable and responsive to user needs, Mureadingmanga is well-positioned to remain a key player in the digital manga industry.
Conclusion
Mureadingmanga is more than just a manga reading platform; it is a community for manga enthusiasts to discover, enjoy, and discuss their favorite stories. With its extensive library, user-friendly interface, and commitment to quality, Mureadingmanga has become a go-to platform for manga lovers in 2024. As the digital manga landscape continues to evolve, Mureadingmanga’s focus on accessibility, quality, and community engagement ensures it will remain a favorite destination for readers around the world.
Before Ending, I’ve noticed your interest in Our Blog. We have covered the topic “What is Sirler? Understanding the Enigmatic Concept,” which you can explore on our blog.
Post Disclaimer
The information contained in this post is for general information purposes only. The information, including images, is provided by What is Mureadingmanga? Exploring the World of Online Manga Reading, and while we endeavor to keep the information accurate, we make no representations or warranties of any kind, express or implied, about the completeness, accuracy, reliability, suitability, or availability with respect to the website or the information, products, services, or related graphics contained on the post for any purpose. Please note that images used in this post may be included for entertainment purposes and do not necessarily represent factual or real-life scenarios.


How Females Can Remove Belly Hair Without Irritating Their Skin?

The Benefits of Affordable Dental Care Plans

How to Create an Absence Management Policy That Works?

What is Masqlaseen? A Complete Overview

What is Moye Moye? Understanding the Serbian Phrase and its Meaning

What is soymamicoco? A Complete Guide
-
 Entertainment10 months ago
What is Moye Moye? Understanding the Serbian Phrase and its Meaning
-
 Entertainment10 months ago
What is soymamicoco? A Complete Guide
-
 Technology9 months ago
What is an XCV Panel? A Guide to Its Uses and Benefits
-

 Entertainment9 months ago
Is Ztec100.com Your One-Stop Shop for Digital Solutions?
-
 Business9 months ago
What is Roadget Business?
-

 Entertainment9 months ago
What is 06shj06? – Uncover The Mystery
-

 Entertainment9 months ago
Who is Elon Musk? – Unveiling the Visionary Entrepreneur
-

 Technology9 months ago
The Science of Calculation: Exploring Calculator Technology
Pingback: Masqlaseen vizaca.net
Pingback: Exploring Masqlaseen: A Spiritual Center, Ancient Civilization, And Symbol Of Resilience
Pingback: Exploring Masqlaseen: A City, People, and Tradition
Pingback: What is Moye Moye? Understanding the Serbian Phrase and its Meaning
Pingback: What is soymamicoco? A Complete Guide
Pingback: Elon Musk: Revolutionizing Industries and Shaping the Future
Pingback: What is 06shj06? - Uncover The Mystery
Pingback: What is Roadget Business? - MasQlaseen
Pingback: What is an XCV Panel? A Guide to Its Uses and Benefits